Use a custom domain with your Notion page using Cloudflare workers.
Table of Contents
Things you need
In order to follow this tutorial you need:
- Your own domain name (I’d recommend porkbun.com)
- Access to the domain names DNS settings
- Cloudflare.com account (no credit card or any payment required)
-
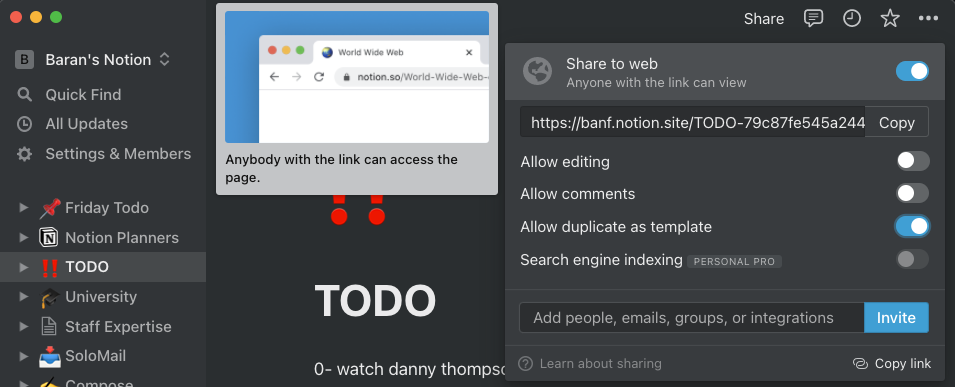
Notion Page that’s set to public To set your Notion page to public click
Shareat the top of the page and clickShare to web.
Cloudflare Setup and DNS Settings
Cloudflare is often used as a content-delivery network (CDN), essentially it serves content to websites and has tools in place to protect your website, such as if it’s under a DDoS attack.
What we need to do on Cloudflare is use the Workers feature which will forward incoming requests from users to your public Notion page, we’ll get onto this in a bit.
Assuming you’ve registered on Cloudflare, you now need to add your domain to it. Here’s how to do that:
- Click add site on the top right
- Choose the free plan.
- Copy the nameservers Cloudflare provides. Usually something like
craig.ns.cloudflare.com(it’s important you copy the ones Cloudflare provides for you).
Change the default DNS server of your domain provider
This step will vary depending on your domain provider, however you have to change from your providers default DNS nameservers to the ones Cloudflare provided you with.
For example here’s a tutorial for cPanel - link to tutorial be warned it’s very wordy but the main bit you need starts with “How Do I Change Nameservers in cPanel?” I’d suggest using CTRL + F to go straight to that heading.
Note that when you change your DNS servers it can take a while for the changes to take place, worst case scenario it can take up to 24 hours (usually an hour or two maximum though).
Cloudflare worker
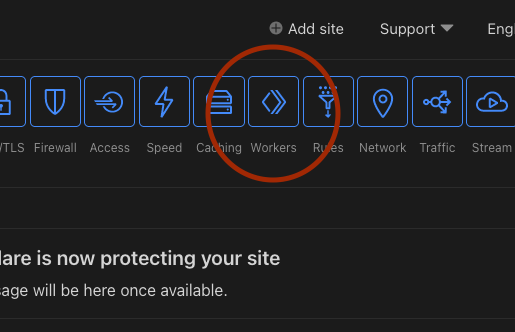
This is where the fun begins and it gets a little technical. On the Cloudflare website click Workers at the top and then Manage Workers, then Create a worker.

There’s a website up here which generates the code you need for this. It may or may not be available when you’re reading this, if not I have put the current working code below.
The code you need is on my Github, available here, you do not need to know how it works or what it’s doing. All you need to do is change the domain for MY_DOMAIN to your domain and put your Notion pages ID into where it says '771ef...' for example in the image I put of my Notion page above my page ID starts with 79c87fe54... you need to keep the single quotes (these things - ’).
After you Copy + Paste the code, click on Save and Deploy.
Setup the route for the worker
We now need to setup the route for the worker we just created. This will tell the worker which URLs it should work on. This time click on Add route and enter your domain like so: DOMAIN.com/* so if my domain was hello.xyz mine would be hello.xyz/*.
After you do this, click save and let Cloudflare do it’s magic! If everything worked you should now be able to go to your domain such as hello.xyz and it’ll redirect to your Notion page!
For your information Notion is continually updated and new features are released frequently so this may not work in the future or tomorrow, but does as of the 19th October 2021.
Also, this project has a Github repository called “Fruition” here where there’s a community of people helping each other debug their issues and get this solution working.